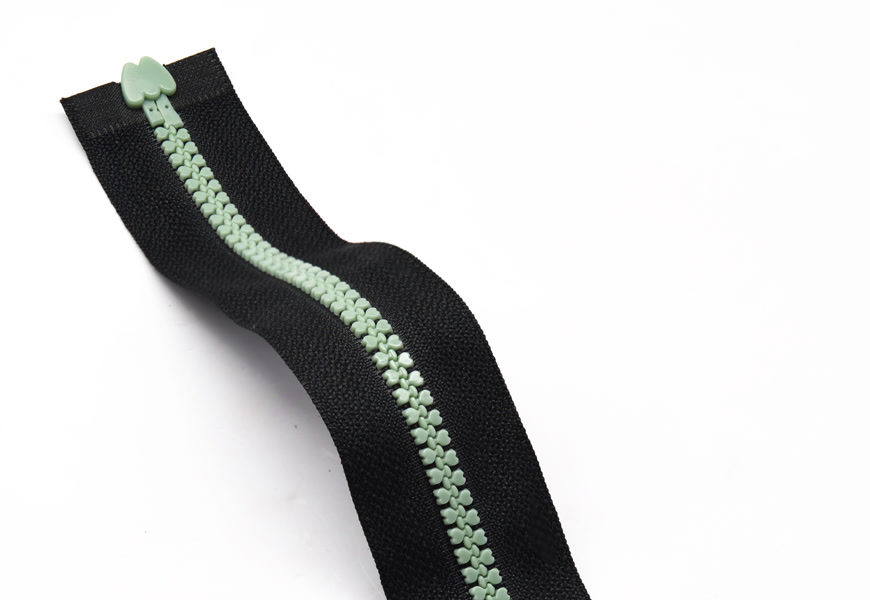
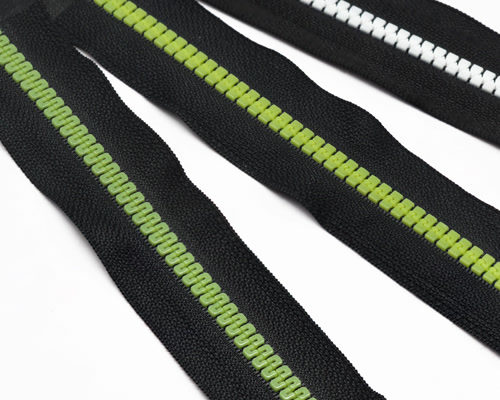
A size 5 special-teeth plastic zipper uses injection-molded profiles that differ from a conventional basic tooth shape, creating distinctive chain edges, engagement lines, and surface rhythms. The samples show pale green teeth on black tape, while different versions display more block-like, rounded, or segmented contours. Special teeth is a broad design description rather than one fixed geometry shared by every product. Development and purchasing therefore need a physical reference or controlled drawing that identifies the exact version and its mating components.
Recognizing Special Tooth Geometry
Examine a special tooth from the front, from the side, and after engagement. Front geometry determines the decorative outline, side height affects the slider channel and sewing clearance, and the engaged view establishes which details remain visible on the closed zipper. The photographed chains create a clear boundary against black tape, but images cannot replace dimensional measurement or establish strength, flex life, or universal interchangeability.
A useful inspection moves through three levels: individual tooth, short engaged section, and complete zipper. First identify the recurring features of one tooth, then check whether adjacent teeth produce a continuous line, and finally operate the slider along the entire chain. Repeat after gently curving the zipper, paying attention to possible interference around protruding contours and tape edges. Where a product family contains several special profiles, assign separate identifiers and samples instead of treating the shared name as sufficient.
Confirming Size 5 and the Application
Size 5 identifies the nominal product size, but different special profiles can create different visual weight and occupied space even within that designation. Before using one in a placket, pocket, or decorative opening, place the actual sample on the pattern. Measure overall chain width, tooth height, slider envelope, stitchable tape area, and end-fitting space. Confirm open-end or closed-end construction, and estimate how much of the tooth design remains visible after folding and stitching.
The contrast between pale green teeth and black tape demonstrates how an exposed profile can become a design feature. Actual color decisions should still be made beside the shell fabric, lining, and neighboring trims. Similar tooth and tape colors produce a unified appearance, while stronger contrast emphasizes the tooth outline. Slider and pull selection involves both color coordination and internal fit. Pin, box, stop, and pull orientation should be marked on the approved sample rather than inferred from a tooth photograph.
Selection and Component Approval Checklist
- Identify the exact profile: Retain front, side, and engaged close-ups together with a physical sample or drawing, and specify tooth color, tape, size, and termination version.
- Measure occupied space: Record chain width and height, slider envelope, and end-fitting dimensions for checking pattern pieces, presser-foot clearance, and lining space.
- Verify slider fit: Operate the selected slider along the complete chain in straight and gently curved conditions; the shared size 5 label is not a compatibility test.
- Inspect terminations and tape: Check how stops, pin, or box join the special teeth and ensure that protruding geometry leaves a practical stitching area.
- Review an assembled sample: Evaluate visible tooth detail, placket flatness, pocket operation, lining clearance, and any operation or care tests relevant to the article.
Sewing and Use Precautions
Protruding special profiles may require a different presser-foot approach, so sew a trial before production. Choose a foot that passes the chain smoothly and keep the needle within the stitchable tape. Do not reduce the seam allowance by sewing dangerously close to the teeth. Feed both tapes evenly, stop before moving the slider, and prevent the needle, foot, or sharp tools from striking the tooth surfaces. After sewing, inspect threads, folded edges, and lining for interference with the slider path.
If the article will be pressed, verify temperature, pressure, and contact method on a sample with the same construction. Avoid holding a hot presser against raised tooth profiles for an extended period. Stiff brushes and abrasive cleaners may scratch molded surfaces. When resistance occurs, inspect for trapped fabric, debris, or forced twisting before gently reversing the slider. Forceful repeated pulling does not prove that the profile is wearing in and may conceal an underlying fit problem.
Common Questions
Are special teeth necessarily stronger than regular teeth
No such conclusion follows from the word special. It primarily indicates a difference in tooth design. Strength and durability also depend on material, structural dimensions, slider fit, and conditions of use, so relevant testing is required instead of visual judgment.
Can sliders marked size 5 be interchanged directly
Interchangeability should not be assumed. The same nominal size can coexist with different tooth heights, engagement contours, and slider channels. Test every proposed substitute along the complete chain, including curved areas and locations near the end fittings.
Is one chain photograph enough to place an order
A photograph helps communicate appearance but does not define the complete product. Size, length, tooth color, tape, slider, termination, and measurement method also need specification. Retain a physical approval sample or controlled drawing so that the selected profile can be identified unambiguously.